Waste stream diversion is alive and well here in the Kenai Peninsula. We have multiple entities working independently (and some jointly) to divert and/or reduce our waste stream. Some that I am aware of, and I’m sure there are others, are nonprofit entities like the Cook Inlet Keeper, Kenai Change, ReGroup and the Kenai Watershed Forum providing education, composting and water monitoring services.
There’s also the Buildup Thrift Store, which has been keeping track of the total weight of materials saved from the landfill, from 2023-2025 their store saved 320,465 pounds (that’s 160 tons!) currently for the first two months of 2026 they’re over 15,000 pounds!
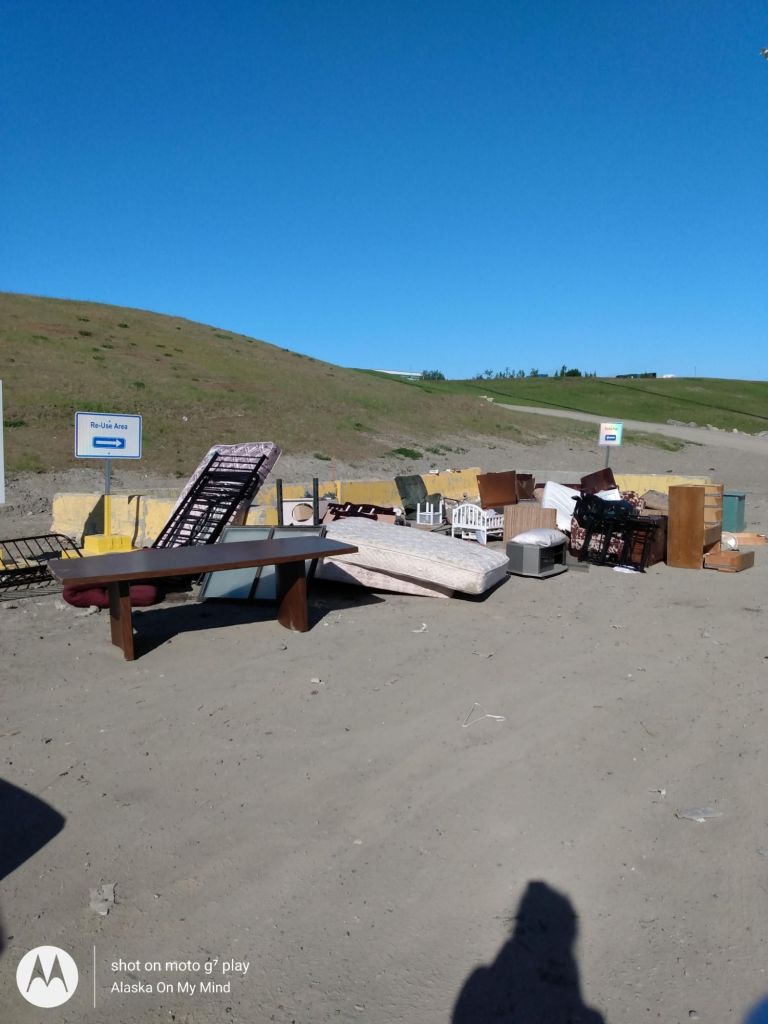
Kenai Peninsula Borough’s Central Peninsula Landfill participates in recycling programs, although recent setbacks have paused the program, cardboard recycling has now resumed with the purchase and installation of a new-to-us baler (even the Borough benefits from secondhand items)! The landfill as well as individual transfer sites have set-aside locations for items that can be rehomed.
The Goods, sustainable grocery, offers multiple WSD opportunities, a few of those include: reusing post consumer glass containers for packaging, offering bulk items to reduce plastic consumption, a second hand shopping area, and a community “free” area outside of their store. Plus the numerous thrift stores that accept donated items and a few Facebook groups where people offer items free of charge instead of disposing.
Individuals on the home/family level are also participating by recycling, composting, reusing and thrifting. All of these things are part of our greater waste diversion program. Picking (salvaging, dumpster diving, junk collection, etc) is one important part of waste stream diversion that is often overlooked or underappreciated. Let’s talk about this!
Pickers and junkers have been around literally forever. “One man’s trash is another man’s treasure”, a colloquial phrase attributed to the 1860s author Hector Urquhart in his “Popular Tales of the West Highlands” but many claiming it has its roots in much earlier renditions perhaps reaching back into the 1690s. Thus proving that human nature hasn’t changed all that much in the past three hundred and thirty odd years.
Picking serves to help the individual picker, whether that be via finding useful objects to employ, valuables to resell or raw materials to repurpose. Picking serves the greater community via trash clean-up in urban & rural areas, landfill waste reduction (less trash to bury extends the life of the landfill proportionally to the amount rescued) and even extending to creating housing or employment for those otherwise unserved in these areas. The habit can be contagious as many folks from all walks of life can benefit by “free” stuff occasionally or more often with the habitual pickers.
Some people have a negative view of pickers considering the practice dangerous and unsanitary, or assuming poverty is the driver of the habit while simultaneously having a negative view of poverty. While both safety and health are important factors, each individual picker is their own sovereign person, able to judge for themselves what they are prepared to risk and thus should be expected to be responsible for their own health and safety and carry their own liability instead of placing that liability onto another. Poverty is another story, and sure, there are those who pick that are also impoverished. My question is if a person is trying to provide for themselves why should we begrudge them a living?
Consumerism has cost us greatly here in the US of A and worldwide via loss of land to accumulate trash, the cost borne by taxpayers and individual fees paid by users, to the environmental impact extending far into the future. We produce far too much trash. The Central Peninsula Landfill estimates the annual amount received of all materials as 60,000 tons!!
We consume and discard.
But it wasn’t always this way. Many Indigenous people groups have long prided themselves, and rightly so, on a near zero waste lifestyle as it comes to harvesting wildlife and living in a symbiotic relationship with the Earth. For the rest of us, our not so distant ancestors produced less waste than we do. Our great-great grandparents could teach us a thing or two about buying or building quality that lasts and you repair it when it needs fixing instead of throwing it into a landfill (of which most of them had no experience with, they were throwing what trash they created into a gully or burn pit on their property!) I see picking as an extension of such ideals: Reducing waste, making use of things that clearly still have life left and recreating other items long past their prime.
We can and should do better.
Let’s support all the ways we can divert waste, including pickers! If you would like to join a discussion regarding picking at the CPL join the Facebook group here.
For more information on our CPL you can go here.