
-
What else has been going on around here…
- Waste Steam Diversion on the Kenai March 14, 2026
- Twenty-One January 29, 2026
- Nostalgia January 8, 2026
- We Made It! December 22, 2025
- We Make Do, So Can You! November 2, 2025
Archives
Categories
Moments in Time
March 2026 S M T W T F S 1 2 3 4 5 6 7 8 9 10 11 12 13 14 15 16 17 18 19 20 21 22 23 24 25 26 27 28 29 30 31
Tag Archives: re-purposing
Mercy, it’s been a minute since my last Sourdough post. Fishing comes first, that’s my motto. So back to one of my favorite past times…
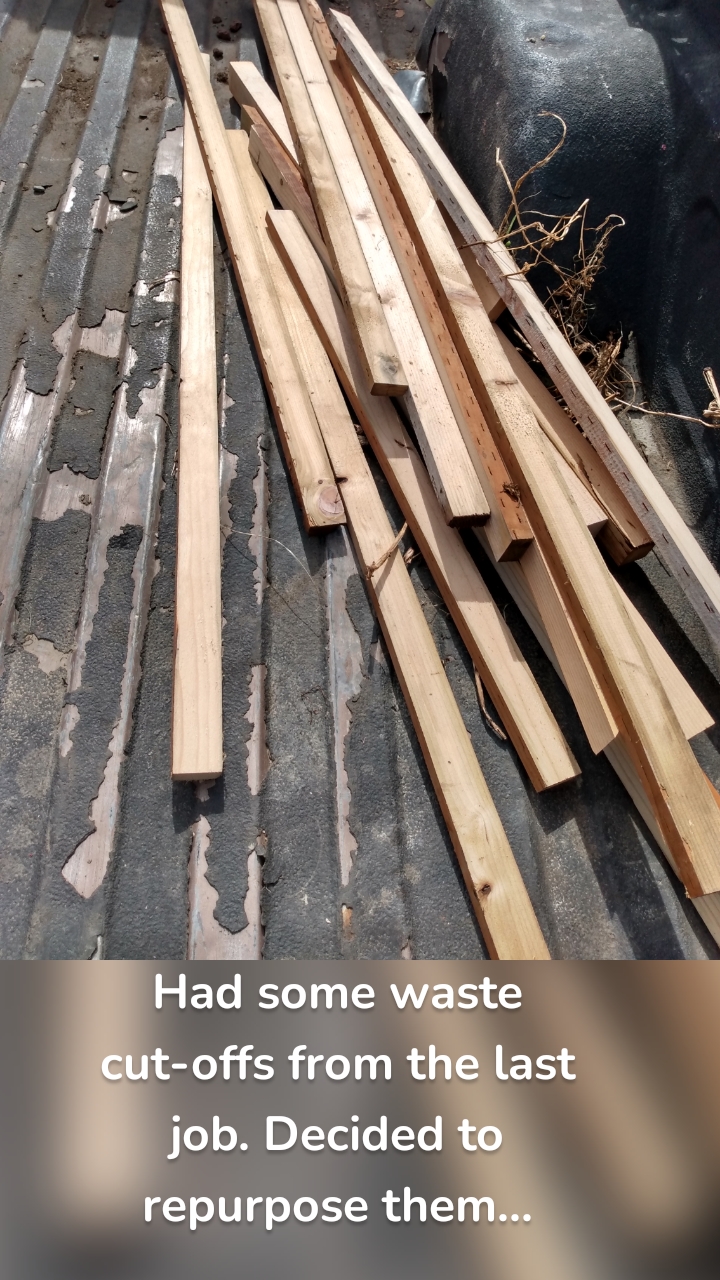
I’m always in the lookout for recycled projects. ♻️ Besides being good for the environment, and usually my budget, it’s fun to turn someone else’s trash to my treasure.
I found this set aside at the dump and figured I could repurpose it as a wood burning chiminea. Which will be just right this fall when it starts to cool down and we need to take the chill off whilst sitting outside.

I started by disassembling the pipe and then removed the tabletop. Once those were apart I struggled with removing the poly weight reservoir from the underside of the pedestal. The 4 bolts holding it in place were rusted and fused, two of them pulled right through and the other two wouldn’t budge. I swear the thing was made like Samsonite luggage. It took a minute… Or 20. Wish I’d had a gorilla.
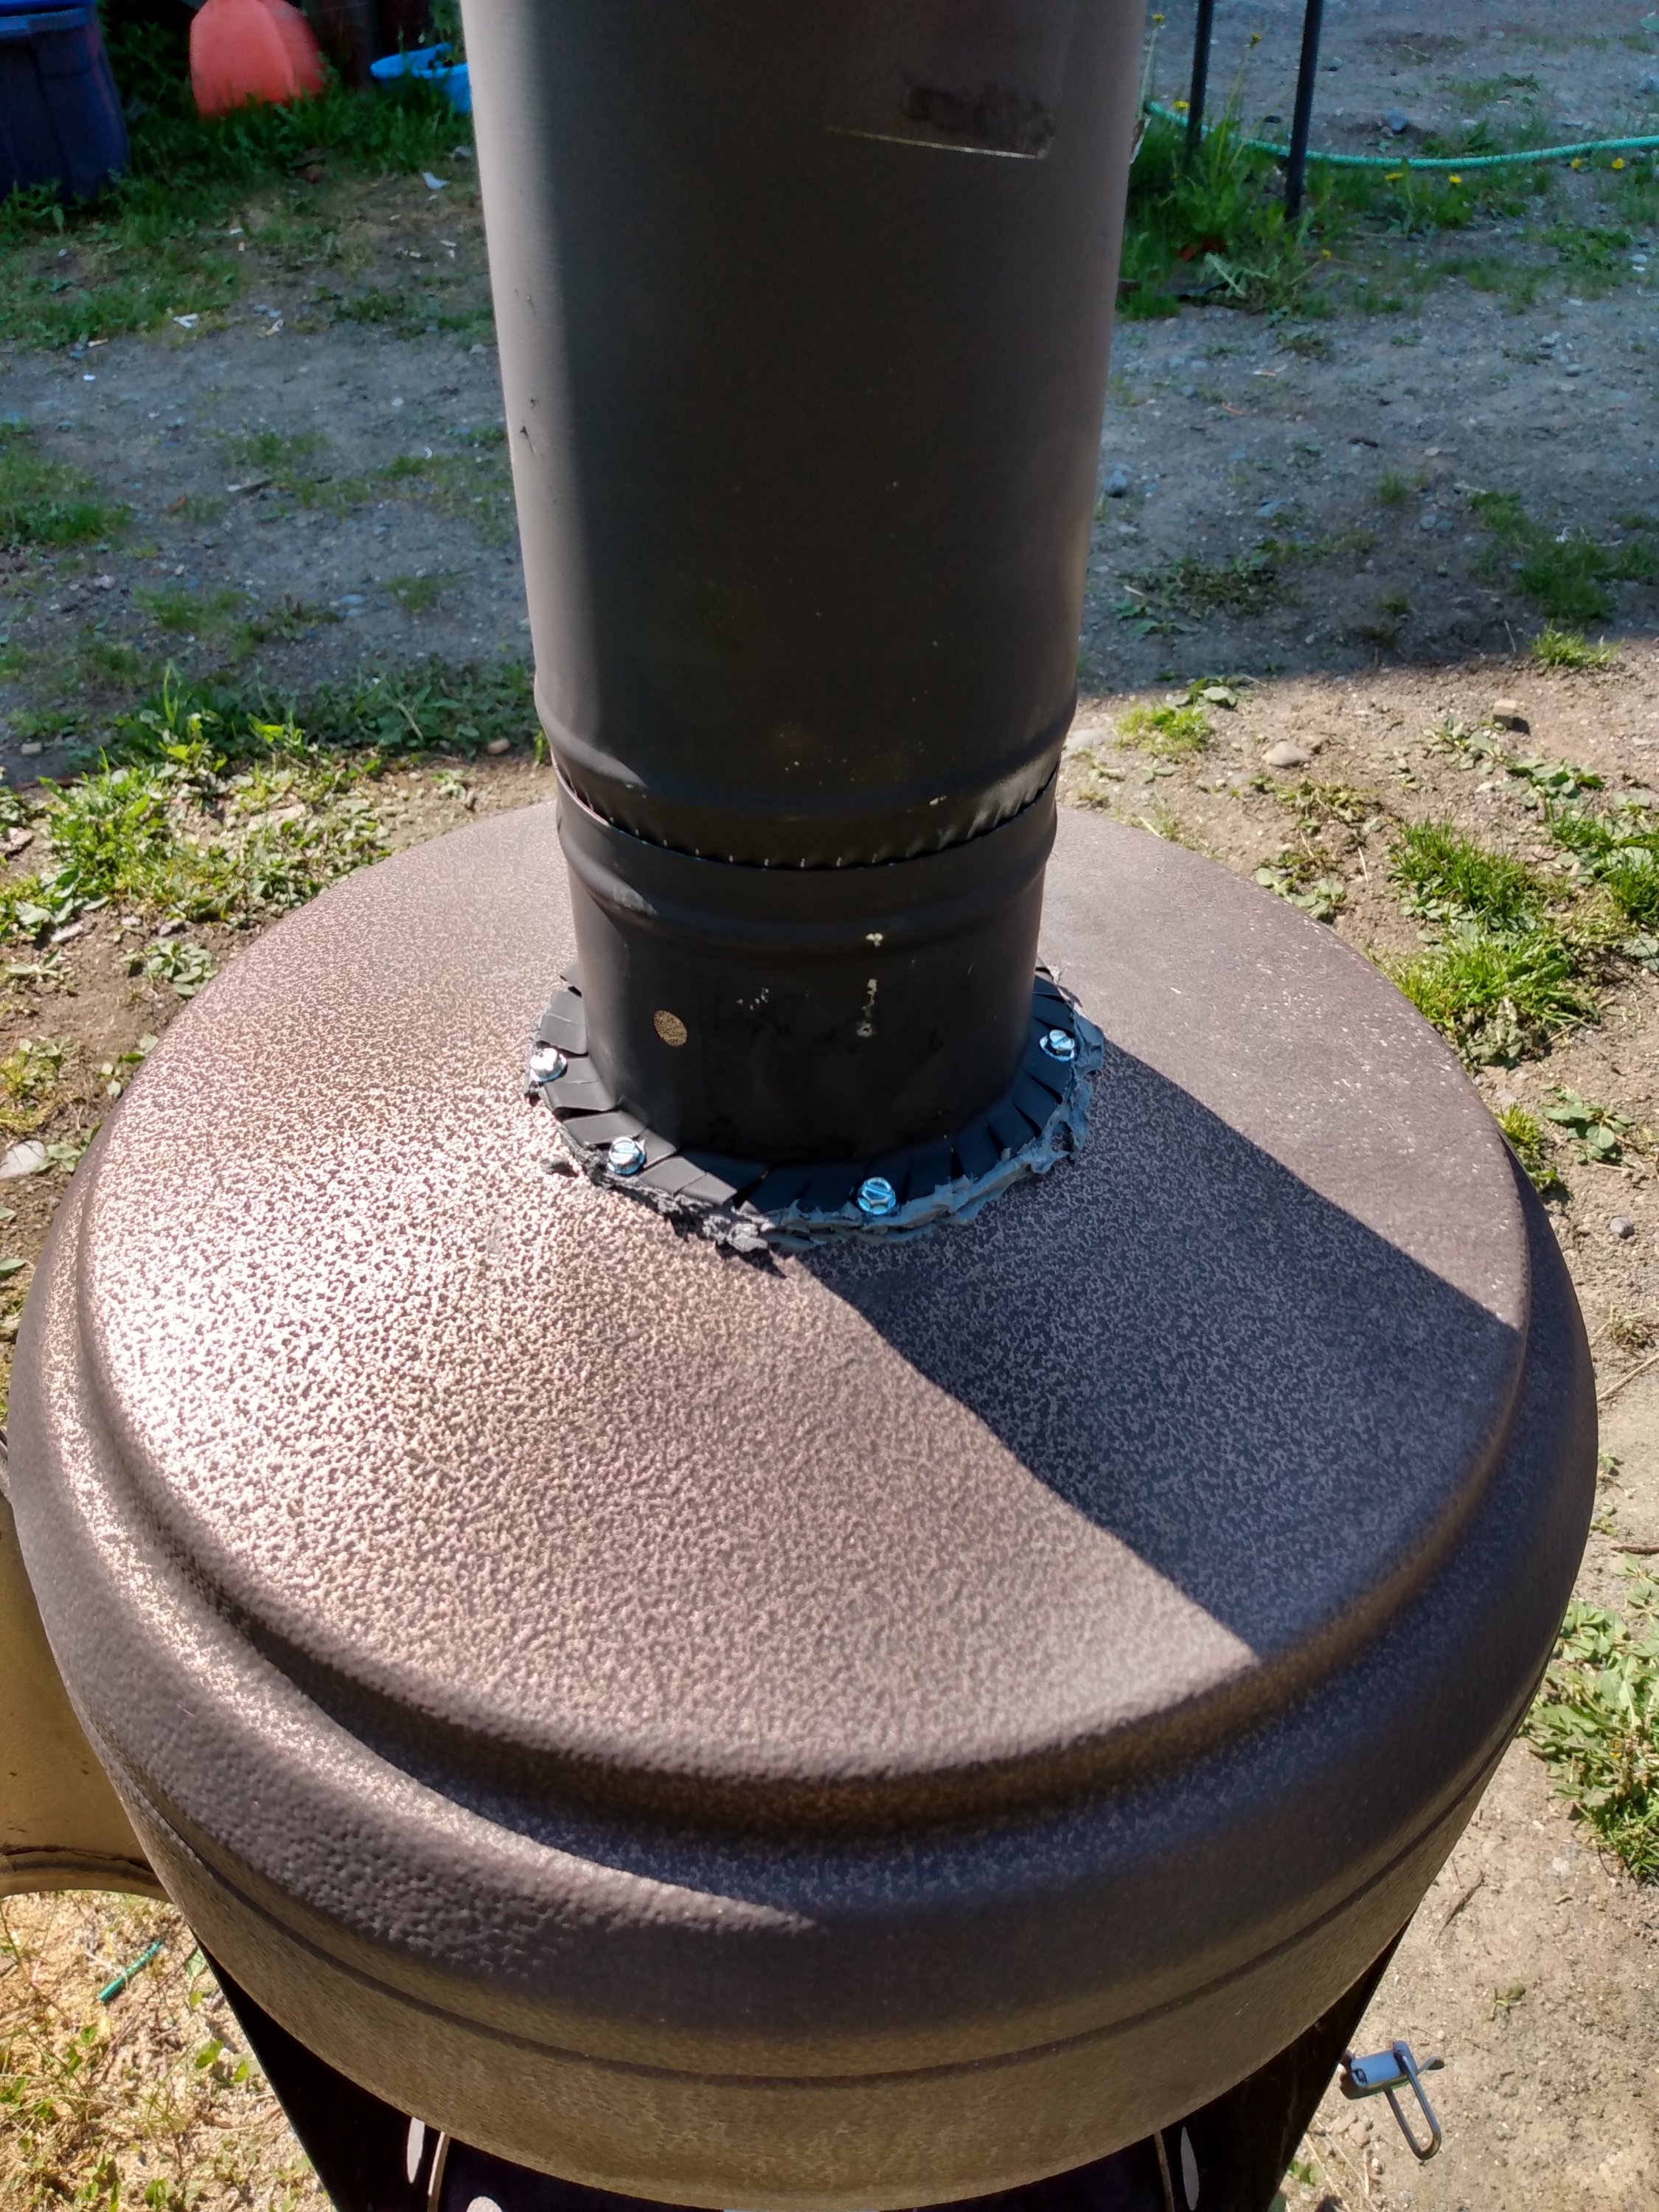
I used a 4″ hole saw and cut out a larger hole to receive the new stovepipe. Side note: A 4″ hole saw is slightly larger than needed for the stove pipe but I didn’t have anything smaller that wasn’t too small, so 4″ it is!
I affixed a starter collar with machine screws and stove mortar.

Then I made a refractory mix with plaster of Paris and perlite to weight the bottom of of the chiminea to keep it from toppling over and give it some heat protection.
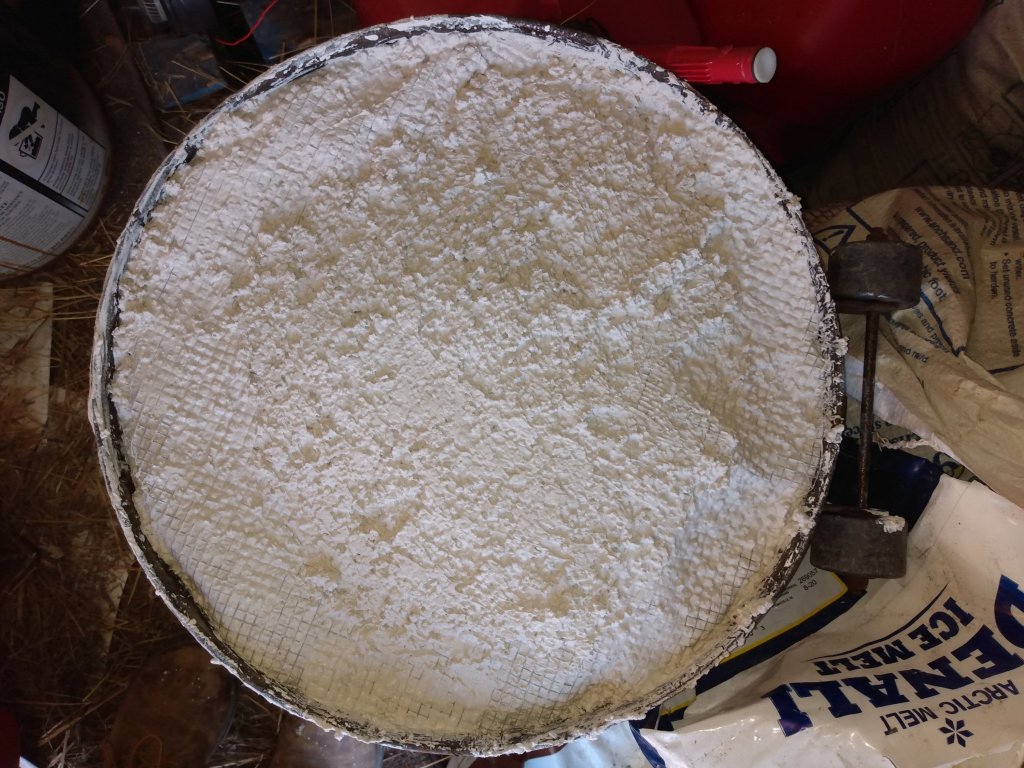
I decided to use a metal bucket as the fire chamber inside the stove to hopefully make it last longer. It was Dean’s idea and I went with it. For the bucket I poured refractory mix in the bottom about 2 inches deep and drilled air holes around the bottom. It fits nicely inside the unit.
I let it dry thoroughly before it’s first firing, about 8 days. First fire at the beach, it works!

The refractory mix in the bottom helps insulate the unit quite well. There’s no heat exchanged at all. I used a piece of white paperboard to close a central hole when I poured the mix in. The paper is still intact and not even singed. I honestly think I could use it on a deck. I’m very happy with my landfill rescue.
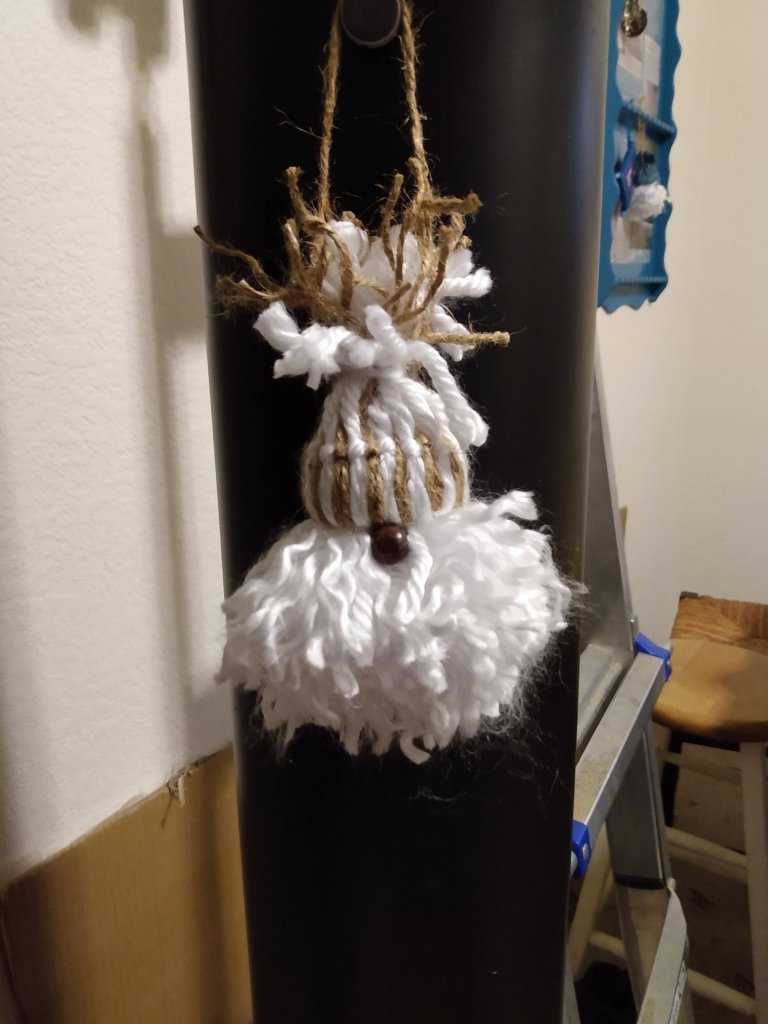
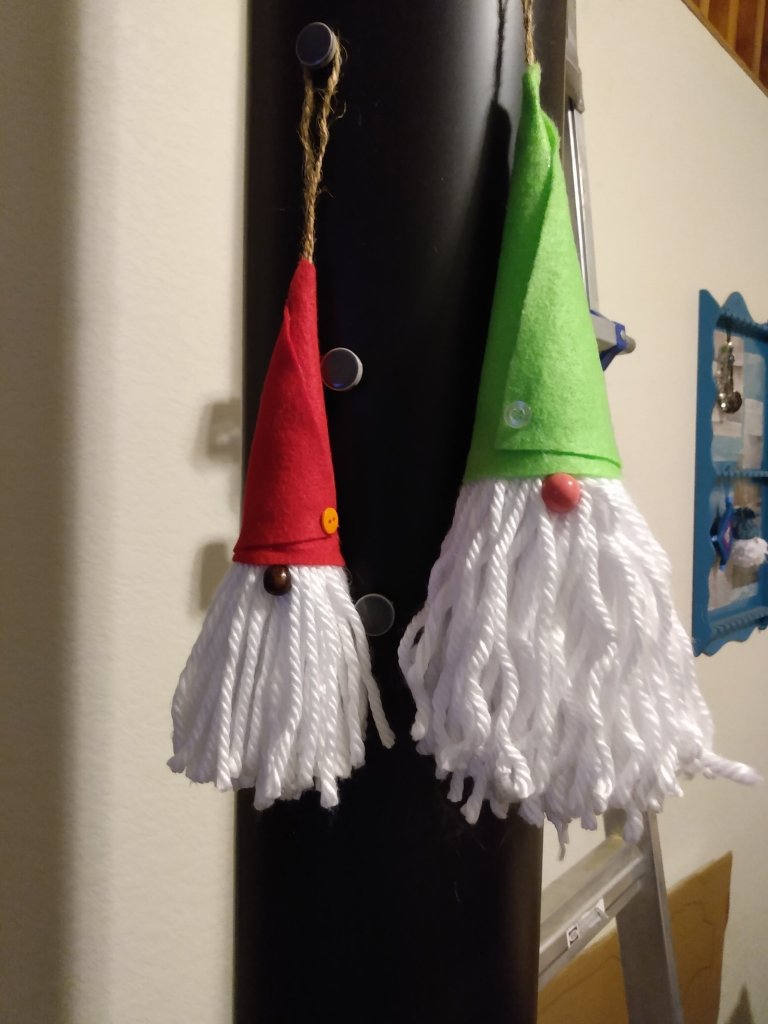
Cletus decided we needed to make these adorable little gnome garland strands. We ended up with 10 of the turquoise and 11 of the pink/black ones. Two kids made themselves a gnome. And we made three oddball gnomes for variety.
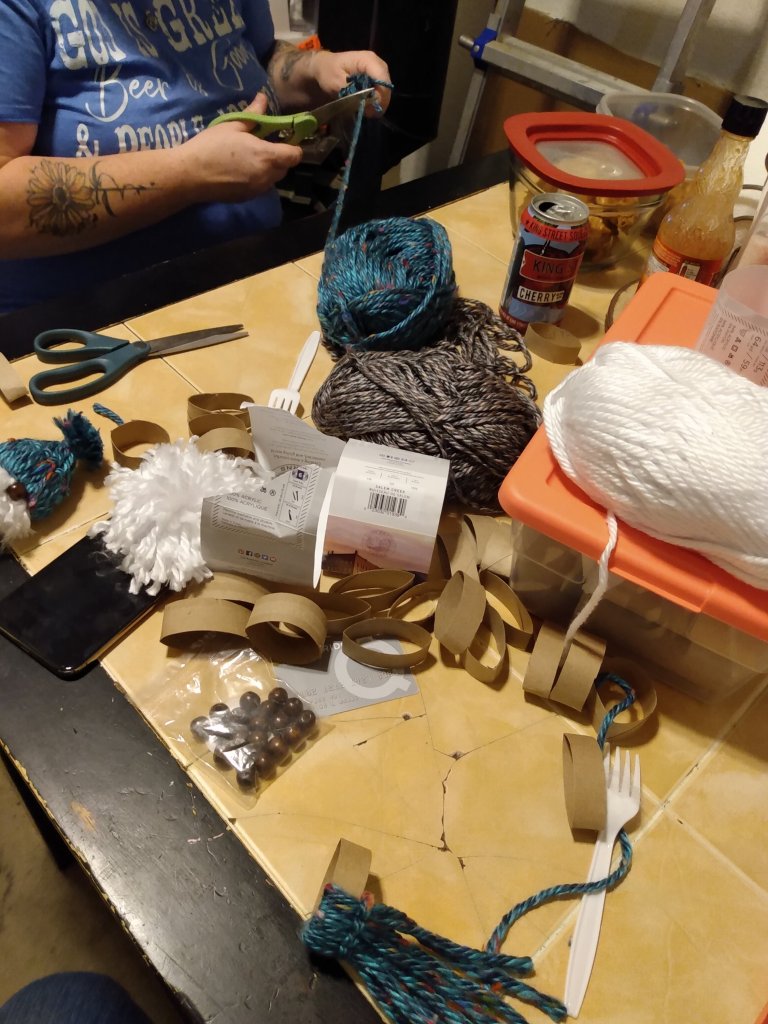

The hats are made by looping yarn around a paper towel tube that’s been cut down into 3/4″ rings, give or take.

The beards are pom-poms glued into the hats. And a wooden bead for a nose.
I’ve never seen so many gnomes.

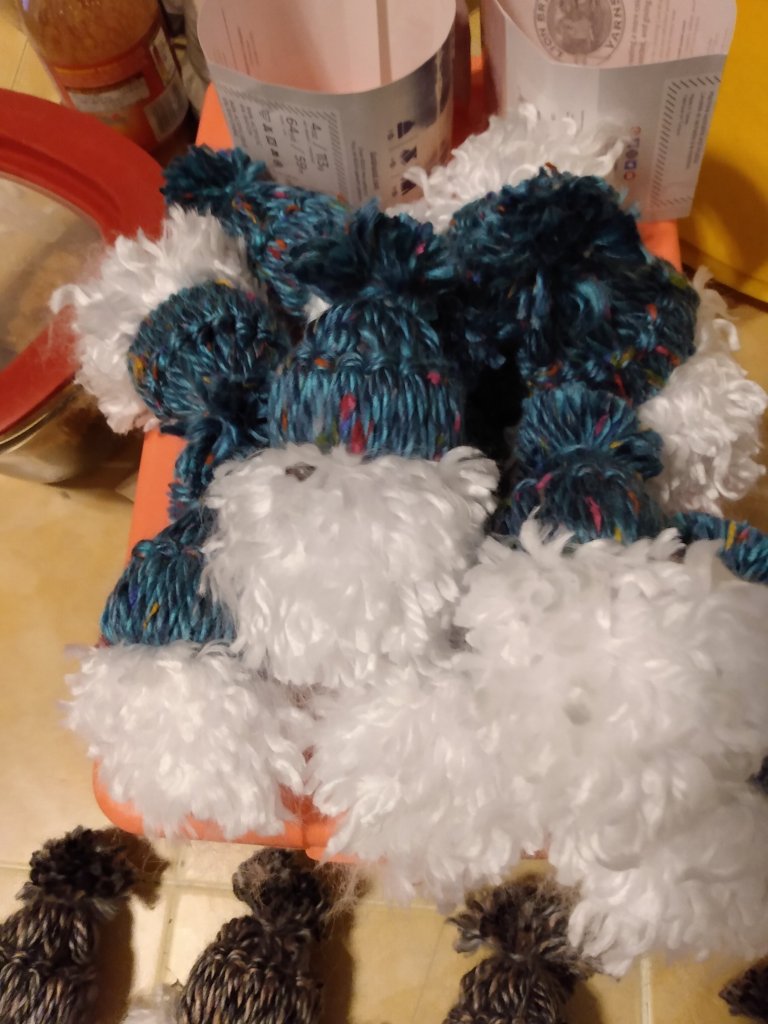
They were a fun craft, lots of yarn cutting and pom-pom making silliness.
#crafts #gnomes #notbored #fiberart
Many a year ago I made my Dad a crocheted rag rug. I thought it was pretty awful, I told him to put it in the outhouse! Fast forward to last year and I found that same rug in the sauna, he still had it and it was still in one piece!
So back to today, I have all of these clothes out at the cabin that are well-worn by Dad. Not really worth giving away and besides, I’m such a sentimental sap I would rather keep them. So I decided to make a rug out of his sweatshirts, he had so many of them!
Three sweatshirts worth braided and stitched together, working on the next set of three now.
I love the look of a braided rug. And this one is so thick and comfy to stand on! The only drawback is that they take a long time to create. I’ve got several hours and trips out to the cabin invested in this rug already and I’m only half done at this point.
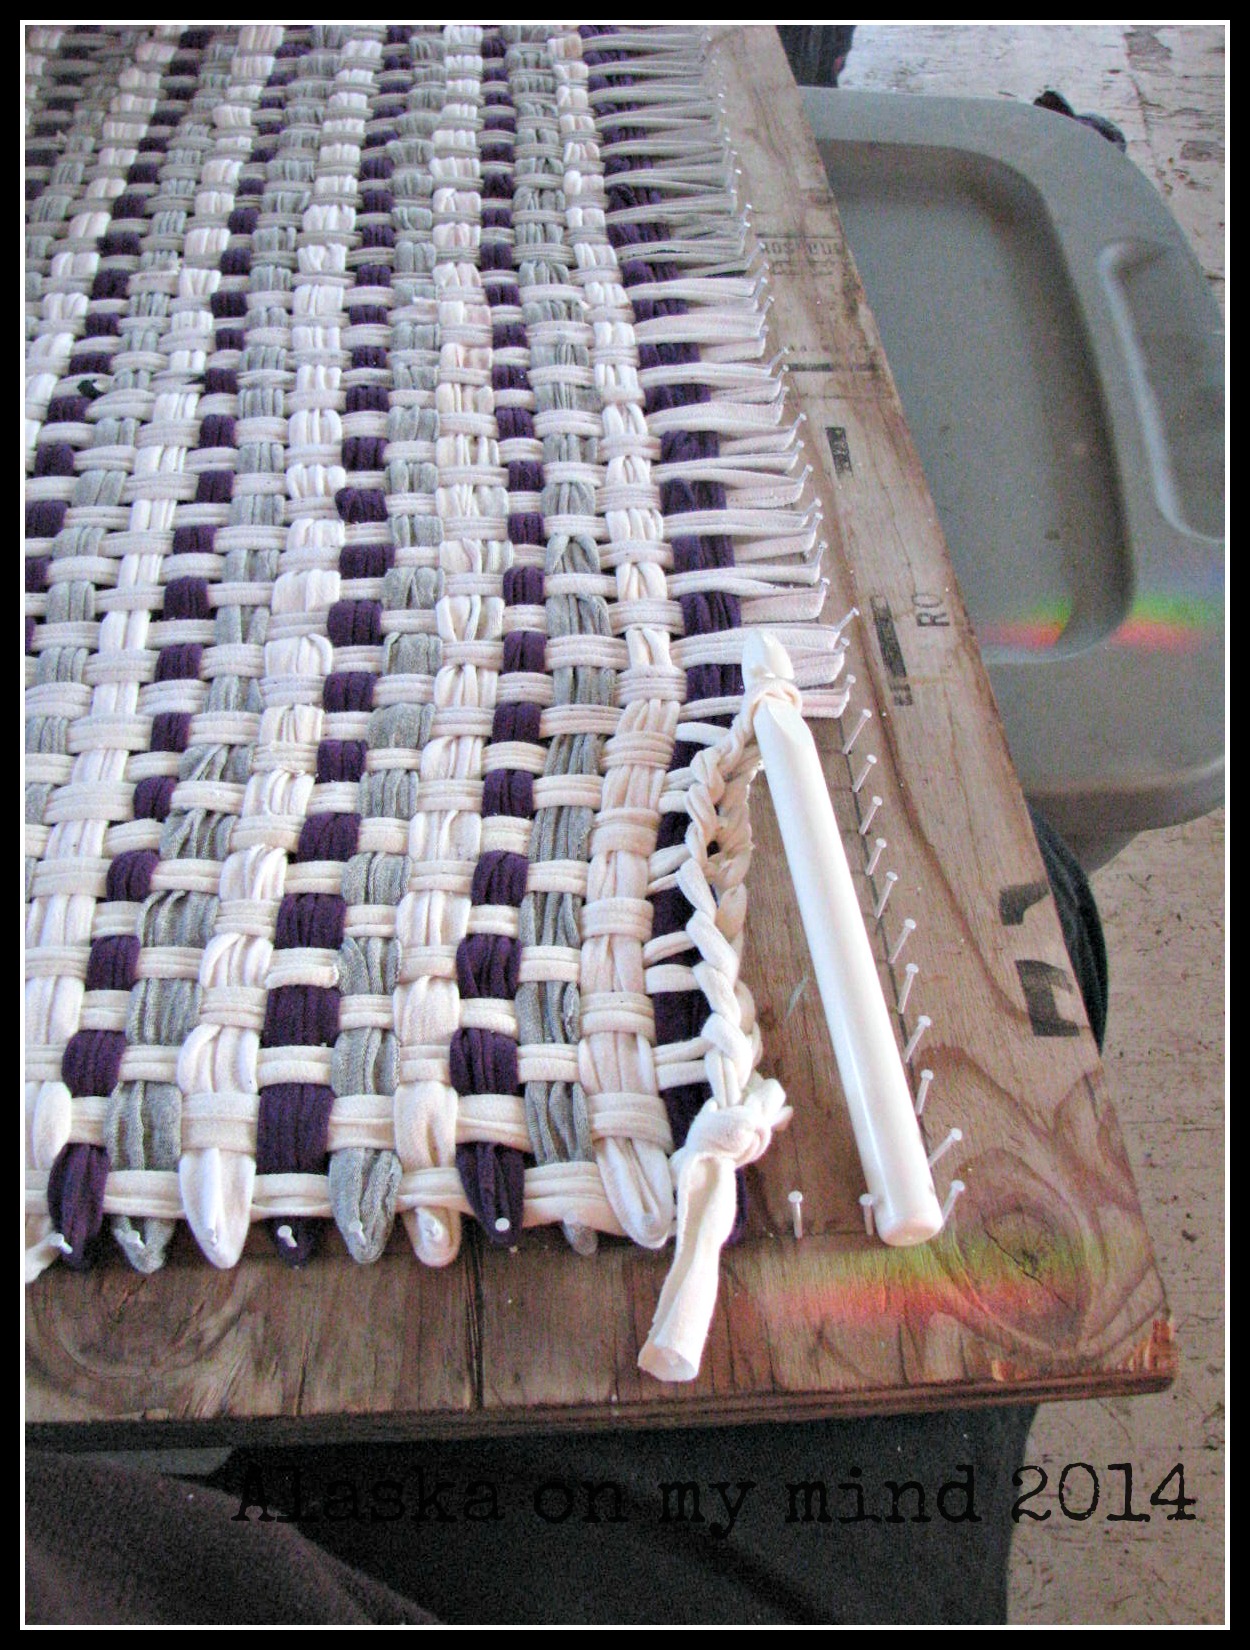
I decided that I didn’t want to wait for a rug and opted for a woven rag rug made from T-shirts like this one that Dad has had for 20 years or so…

A blast from the past!
And I made a simple loom from a piece of plywood I found out in the shed and some paneling nails…

My simple loom, laying out a pattern with T-shirt loops.
Then I went to work wrapping and weaving, and in about 3 hours time I was ready to finish the ends….
Crocheting the edge of the rag rug.
And then I had a finished rug for my little kitchen floor!

All done! 6 T-shirts worth in this rag rug.
Now if I can just get my braided rug finished….
